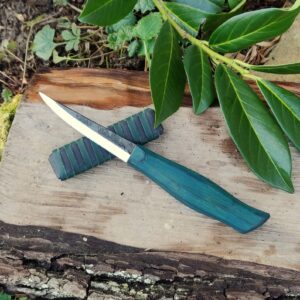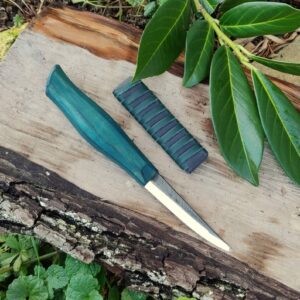

So, you want to have a go at making a woven bark sheath, or perhaps try you hand at some basket weaving? Getting hold of traditional, natural materials for making your own things can be difficult without a few pointers. I hope this article will help you on your way!
Do’s & dont’s
Do make sure you have permission to cut or harvest any materials
Do make sure you know how to cut/harvest correctly so as not to cause unnecessary damage to flora/fauna
Don’t take more than you need
Do harvest with respect & gratification – leave a gift, say thanks, however you do it remember gathering materials is a reciprocal relationship.
for a more in depth musing on the rights and wrongs of harvesting wild materials, click here
Step one – Identification
Trees with bark useable for weaving, sheath making, etc…
- Sweet Chestnut – Castanea sativa
- Goat Willow – Salix caprea
- Crack Willow – Salix fragilis
- Birch – Betula
- Elm – Ulmus
- Lime – Tilia
- Lawsons Cypress – Chamaecyparis lawsoniana
- Leland Cypress – Cupressus × leylandii
- Monterrey Cypress – Hesperocyparis macrocarpa
- Western Red Cedar – Thuja plicata
- Eastern White Cedar – Thuja occidentalis
- Cherry – Prunus
- Spruce – Picea
The above list is not complete. I’m sure there are many other trees and plants suitable, however I’ve only mentioned ones which I have used myself.
The bark on all of the trees mentioned above grows in pretty much the same way, and thus the harvesting/preparing of it is essentially the same. The exceptions being Birch & Cherry, of which I will mention separately.
Step two – Understanding trees & bark
I will now explain in very brief and unscientific terms how bark grows. Understanding this even in simplified form is essential to harvesting and preparing correctly.
Bark, like wood, has a grain ‘direction’. This determines in which direction it is strong, and in which direction it is weaker. All the above trees (barring our exceptions) have bark grain running vertically up the tree. This means the bark will be very strong along its length, but prone to splitting along its width, much the same as wood in general.
Bark is in two layers, inner bark & outer bark. It’s the inner bark we are after in all except Birch & Cherry. Once the bark has been separated from the tree, we need to peel apart the inner from the outer, to give us a malleable piece of material. On some species, the outer bark can be left on to add protection and look nice, however leaving the outer bark on can encourage mould growth, cause more splitting, and make the bark harder to work. If the outer bark isn’t removed straight away, its almost impossible to do once the bark has dried.
The outer bark is the trees protective layer, the inner bark is how it transports nutrients. If we remove the inner & outer bark from the entire circumference of a branch or tree, it will die.
It is possible to remove a piece of bark from the tree without killing it, as long as you don’t remove the full circumference. The rule of thumb used by First Nations peoples around the globe is never take more than 1/3 of the circumference of the tree, and it should heal and remain growing. Many of the ancient (still living) trees in the forests of North America bear the scars of harvesting from many hundreds of years ago. I have experimented with this approach on a number of small tree’s over the years and all have survived and remained growing.
Taking bark from living trees is generally frowned upon, for good reason. Do you really need it? It’s a big question to ask yourself before you harvest, and you should probably ask the tree too. I will let you make your own minds up on that one, though obviously don’t go round doing this in parks or other places you don’t have permission.
Bark harvesting must be done from mid/late spring into early summer when the sap is in full flow. By the end of summer the sap has usually begun to diminish and it becomes difficult to remove the bark, during autumn & winter it’s pretty much impossible. Always test a tree by cutting and lifting a small section of bark prior to committing, preferably on a branch rather than the main trunk.
Most of the time, small branches or saplings are ideally suited for bark harvesting. Once a tree grows large, knots are more common, and the chance of twisting grain is far more likely. Also, for the majority of small tasks such as bark sheaths and woven baskets, we need relatively thin bark. The older the tree, or thicker the branch, the thicker the bark. Usually a branch up to 6″ diameter is perfectly suitable, and more often than not branches of 2″ diameter are preferable for weaving materials.
The majority of broadleaf/deciduous trees re-grow after being cut (this is called coppicing). If you are cutting down small saplings, cut them close to ground level and there is a very good chance the tree will survive and re-grow. If removing branches, ensure a clean cut is made without tearing bark, just after a ‘union’ or the point at which another branch shoots off. This will ensure better re-growth than cutting half way along a branch and leaving a stub.
If harvesting any of the Willow (Salix) species, I always push the trimmed ‘brash’ ends of the branch back into the ground. There is a very good chance these cuttings will put down roots and re-grow. In fact, if you’ve no use for the ‘brash’ ends, you might as well do this whatever the species, there’s always a chance it might root!
Birch & Cherry
These species grow their bark completely differently to other trees. The bark grows in many thin layers, and the colder the climate the thicker and better the bark becomes.
Also, the bark grain direction runs horizontally around the circumference of the tree, meaning to harvest any worthwhile amount we must remove the entire circumference. With these species we are harvesting the outer layers of bark, leaving the internal phloem layer and inner bark. With skill, patience and care this can be done without killing the tree. Birch bark has been harvested around the northern hemisphere for thousands of years like this, and the practice is still carried out to this day.
Step three – Harvesting and preparing bark
- Cut branch from tree of the required length
- Cut a vertical slit from top to bottom all the way along the branch – ensure to cut deep enough so you’ve gone through all the bark and into the wood.
- Taking bark from living trees is frowned upon, for good reason. Do you really need it? It’s a big question to ask yourself before you harvest, and you should probably ask the tree too. I will let you make your own minds up on that one, though obviously don’t go round doing this in parks or other places you don’t have permission.sion.ion..n.
- If you want to try and harvest all the bark as one piece, then just do the one cut.
- Using a *spud, begin to lift the bark up from one end.
- Once you’ve got enough bark lifted so as to be able to get a good grip, begin to pull the bark up and away from the branch, at 90degrees to the branch. This technique works for harvesting strips of bark. If you’re trying to remove a large, entire piece of bark from a whole log or felled tree, you’ll need to run your spud up and down the length of the branch/tree, parallel to the cut, peeling back as you go.
- If you’ve done your checks prior to harvesting, this part should be very easy. If the bark is sticking on, you’ve tried to peel before the tree is ready. You may need to use the spud to peel the bark from the tree carefully & slowly – hot water can help.
- Once the bark is removed – separate the outer from the inner by using the end of your knife or finger nail to separate the two at one end, then continue to peel apart the two layers all the way down.
- Now you have your peeled and prepared piece of bark, roll it loosely back on itself to dry & store.
- If you plan on harvesting from a living tree and not cutting out the whole branch, modify the above steps as necessary. Remember – Don’t take more than 1/3 of the entire circumference.
- See video example below
Harvesting Bark Strips
Notes on the above…
* A spud is simply a tool used for getting under the bark to help peel it off, the end of a stick sharpened into a narrow, flat, wedge will suffice.
* Remember to align your initial vertical cuts with the grain direction as best you can. If there are any knots in the bark, try to align these cuts so they run through the knots.
* For some uses you may want the outer bark left on, remember that if you don’t remove the outer bark straight away you’ll never remove it once the bark has dried.
* Like wood, the bark will shrink as it dries. Its always best to let the bark dry out fully, then re-soak prior to using. The longer you can leave the bark to dry/cure, the less shrinkage there will be – Leaving the bark to season/cure for a year before use is the traditional way to work it. If you’re going to dry and store your bark, roll it up the opposite way to which it wants to curl (outside inside).
I hope you’ve found this tutorial helpful!
Remember – respect what you’re harvesting and what you’re harvesting from.
Don’t take more than you need and don’t waste what you take!
Finally, go and get yourself a copy of Braiding Sweetgrass by Robin Wall-Kimmerer.
Don’t ask why, just go and get it.