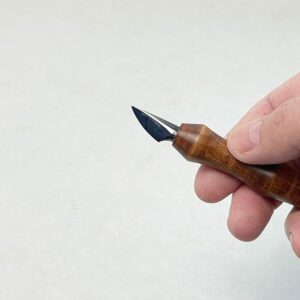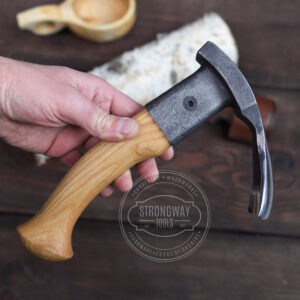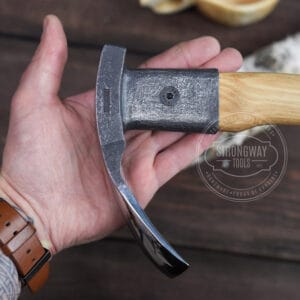
Lots of folks that enjoy carving don’t seem to enjoy sharpening quite so much. I kind of understand that. These folks are interested in carving, not sharpening. Blunt tools are an unfortunate byproduct of carving. And sharpening is a chore to be endured. That’s completely the wrong mindset. And I’m here to help make it more enjoyable.
Sharpening is a slow process. Really let that sink in before you start scraping steel over abrasives. You’re likely to be working on that tool for a bit. A big reason why it takes so long is because of the mistakes that beginners make. Here are some of the biggest mistakes I see people make when sharpening their spoon carving tools.
Have a read and think about how you approach sharpening. Hopefully you’ll be able to correct your mistakes, take less time and get back to carving sooner.
1. Not Sharpening Soon Enough
The most common sharpening question I get is “how often should I sharpen?” The honest answer is “It depends”. After using hand tools for a while, I know what it feels like when they’re not performing at their best. Folks who are still learning grips just haven’t had the chance to learn, consistently, the difference between a blunt tool and slightly off carving technique. Couple this with the aversion people seem to have to sharpening and you end up with tools that need a lot of work to bring them back to life.
If you strop regularly, it will be a long time before you need to take that edge to harsher abrasives. If between stropping you regularly take your tools to the fine stones then the rounding effect of stropping won’t even crop up.
2. Starting Too Fine
With a blunt or dinged up edge your aim is to remove steel until you’ve gotten under the damage. Using an appropriately coarse abrasive will remove the material quickly. Lots of folks start with a finer abrasive that removes material much slower. This is usually because they underestimate how much material needs to be removed or are worried about the potential damage the fast working coarse abrasive might do.
Picking the right level of abrasiveness is a skill that will come with time, but here’s a rough guide (the grits I’m referring to refer to the Shapton Kuromaku stones. Confusingly, a ‘1000 grit’ varies in coarseness between different manufacturers and sharpening mediums):
120-320: very coarse, best used for repairing heavy damage or for changing a bevel angle
1000-2000: good starting grit for general sharpening, should use a finer grit after these.
5000+: good to use between stropping sessions to keep bevels flat, only start with this grit if the tool is sharp but could be sharper.
3. Starting Too Coarse
This tends to occur when someone has a set of grits and feels the need to work through them all every time. The problem you face with using too coarse a grit is that you’re removing more steel than might be necessary.
If you’re starting with a 500 grit or coarser abrasive and the tool isn’t damaged, you might only need one or two passes to start raising a burr. Make sure to check for a burr regularly to prevent yourself from removing too much steel. As mentioned above, with practice you’ll be able to match the condition of your tool with the appropriate grit. Personally I tend to err towards a coarser grit in order to save time, making sure I check for a burr after every one or two passes.
4. Switching Grits Too Soon
This is a major factor that contributes to people’s frustrations with sharpening. You’ve got to raise a burr (push material over the cutting edge from the bevel being sharpened) to know that you’ve sharpening all the way to the edge. This is most important with that first, coarsest grit. Once you’ve raised a burr, you can be confident that you’ve remove material across the whole bevel, right to the edge. Colouring in the bevel with a permanent marker can help show you if you’re removing material across the whole bevel. If you don’t raise a burr with the coarsest grit and move on to something finer, you won’t actually reach the cutting edge with the stones and you’ll still have a blunt tool.
A coarse grit will leave deep scratches in the metal. Those scratches will extend to the edge of the blade. Deep scratches will create a toothed edge, more like a saw blade. You’ll struggle to create a clean finish in wood, and the toothed edges are more likely to be torn away quicker by the wood fibers, leaving you with a blunt tool sooner than you might like.
Fine grits will leave finer scratches, eventually creating a polished surface. If you’ve done a good job with the coarse grit, your job with the next grit is to remove those deep scratches. You then repeat this with finer and finer grits until you have a polished bevel and an edge with microscopic teeth that will move through wood more consistently.
You can still try and feel for a burr to see if you’ve sharpened right the way to the edge, but with grits above 2000 or so it can be difficult to feel the burr. Personally, I rely on checking the scratch pattern to make sure I’ve removed all the deep scratches from the previous grit. Having a rag or paper towels to clean the edge for inspection, and a good light source, makes this job easier.
5. Moving Too Fast
Once again, this is tied to people’s general impatience with sharpening. Moving the tool back and forth over the stone quicker will remove material quicker. If you don’t have good technique it will just screw up your bevel quicker and do little to properly sharpen it.
Go make a cup of tea. Grab a biscuit or two. Put on some tunes or your favourite podcast. Slow yourself down before you even start sharpening. Getting into the mindset that this should be a slow process will stop you from rushing through it and making mistakes.
Get into a good position (more on that below) and move the tool over the stone concentrating on keeping the bevel in the correct position. That’s the aim, not moving quickly. You’ll develop the muscle memory for how each tool should be held. You’ll learn what the tool feels like when it’s properly moving over the sharpening surface. Eventually you’ll be able to gradually ramp up the speed. Going too fast too soon won’t help you at all.
6. Too Much Instability (position and pressure)
Sharpening by hand requires you to be in tune with your physical self. Much like carving, we’re engaging with physical objects, using touch, proprioception, hearing and sight. It requires attunement with ourselves. It’s difficult but that’s what makes it rewarding.
There are lots of opportunities throughout the sharpening process where mistakes can enter. We’re trying to move tools consistently across the abrasive surface of our sharpening medium. Consistency is always tricky. If you shift position slightly, then that might change the angle you’re sharpening your bevel. If you push down harder on one part of the tool you’ll remove more steel than where you’re not applying as much pressure.
Here are a few things I do to try and remain as consistent as possible.
- Sharpen while standing. This lets me move back and forwards from my hips, rather than moving my arms. I’m able to concentrate on keeping my hands in the same position better this way.
- Move slowly. See above.
- Use light pressure to begin. Pushing down hard on your tool will remove material quicker, but it can make it more difficult for you to feel if the bevel is in the correct position or not.
- Sharpen in sections. Trying to move the tool so the whole bevel is sharpened in each pass can require complex movements. It’s better to divide each bevel up into sections so you don’t need to change angles while moving tool back and forth.

By Tom Bartlett – Originally Published April 28, 2021 on www.sylvaspoon.com